|
|
         |
to Daz Prop for Use in Daz Studio
 |
 |
 |
You
can download and convert the Wavefront OBJ version
of this tree model into a Daz Studio prop and it will appear in your
Content
Library.
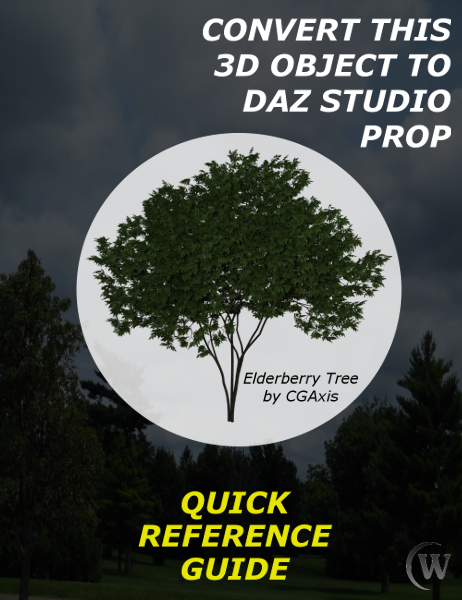
This beautiful tree
model is part of the FREE 3D MODELS SET 2016 available from CGAxis
without the need to register or provide an email: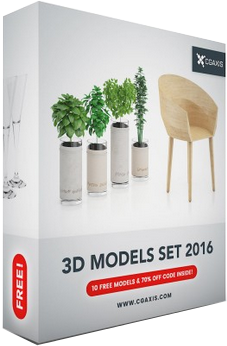 You
can use these techniques to convert any or all 10 included items.
 |
|
Create
Your Own DS Prop: CGAxis Elderberry Tree
Copyright © 2016, Winterbrose Arts and Graphics. All Rights Reserved. This
guide is licensed for Personal and Commercial Use. Users may
distribute/share unmodified copies of this guide as provided in PDF
format. Users may not sell, or include in packages for sell,
copies of this guide. Users may not claim ownership to any
portion of this guide. This guide is provided as-is without
warranty/guarantee of any kind, and end-user is responsible for all
consequences resulting from use of this guide.
|
| WARNING: *** Use of all 3D models is subject to original licensing from distributor. *** Basically you cannot redistribute, share or sell Daz Studio props created from copyrighted materials without permission; and the license may authorize use in creating your own digital artwork and animations created from renders. |
| Here
are the steps
you will need to perform in order to download and create your own Daz
Studio version of this magnificent tree model: |
| 1. Go to link
above to get and unzip your copy of the 693 Mb into a folder of your
choice. The 2016 set contains 10 unique items for free without any email or registration required. |
| 2. Create a folder to hold your
new prop after you have completed the conversion. My
DAZ 3D Library \ Props \ CGAxis \ Elderberry Tree
We also used this
location for the mesh (OBJ) and textures (diffuse, bump,
opacity).Create
subfolders = “\ Mesh” and “\ Materials”
|
| 3. Copy files
for Wavefront Object version (.obj and .mtl) of this model
into “Mesh” folder: “cgaxis_models_54_02.obj”
and “cgaxis_models_54_02.mtl”
|
| 4. Copy files
for various material/surface textures (.jpg) of model
into “Materials” folder: “cgaxis_models_54_02_01.jpg”,
“cgaxis_models_54_02_01_bump.jpg”,
“cgaxis_models_54_02_02.jpg”,
“cgaxis_models_54_02_02_bump.jpg”,
and
“cgaxis_models_54_02_02_opacity.jpg”
|
| 5. Using Daz Studio, import your
new object model and size it as Cararra (1 Unit = 1 Inch). |
| 6. Rename “cgaxis_models_54_02”
in the Scene tab as “Elderberry Tree”. |
| 7. Select node in Scene tab, then
open Surfaces panel and expand Elderberry Tree: a. Select surface “cgaxis_models_54_02_01” and use Browse function to find/apply first and second images respectively to the Diffuse Color and Bump Strength sections, and be sure to set Opacity Strength to 100%. b. Select surface “cgaxis_models_54_02_02” and use Browse function to find/apply last three images respectively to the Diffuse Color, Opacity Strength, and Bump Strength sections, and be sure to set Opacity Strength to 100%. |
| 8. On main menu, select File --
Save As -- Support Asset -- Figure/Prop Assets… a. Browse to Props folder you created, type filename “Elderberry Tree.duf” and click save b. Vendor = “CGAxis”, Product = “DSprops”, Item = “Elderberry Tree”, Content Type = “Prop” then click Accept. |
